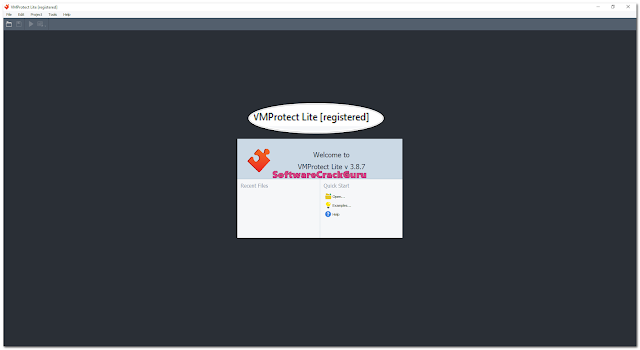
VMProtect Lite is a software application designed for Windows computers that provides protection for software developers by obfuscating the source code. This tool has been widely used in the market for a long time and has proven to be very useful for many users. However, VMProtect is a paid tool, and to use it officially, a license must be purchased. Today, I am providing this tool for free along with its activation key, which you can find in the download section.
Features VMProtect Lite
Virtual Machine
The most powerful obfuscation method for binary code.
Code Transformation: While protecting, VMProtect transforms the code of an application into its own set of commands, which is executed on a virtual machine with a different architecture.
Built-in Protection: After protection, the virtual machine and the new set of commands are built into the protected application and do not require any additional libraries or modules to work.
Wide Compatibility: This obfuscation method supports Intel binaries and .NET assemblies compiled with C/C++, C#, Pascal, VB, and ASM for the most popular operating systems: Windows, macOS, and Linux.
Licensing System
The most advanced license control.
Integrated Licensing: VMProtect provides its own licensing system with SDK, allowing easy creation and verification of serial numbers. The licensing system uses the RSA algorithm, making it impossible for hackers to create a keygen.
Detailed Serial Numbers: Serial numbers can contain lots of information like the name and email of the license owner, expiration date, period of free updates, and more. Any blocked serial number will be denied by new versions of an application.
Trial Versions: The licensing system allows activating time-limited serial numbers and using them for a trial version of an application. This activation method works over the Internet and doesn’t store anything on the user’s computer.
Advanced Protection
These features make the protection truly impeccable.
Virtual Files: Allows embedding additional files in the protected application, useful for creating portable applications.
Packing: Packs the whole application and unpacks it in the memory at startup.
Debugger Detection: Prevents the protected application from running in a debugger.
Virtualization Tools Detection: Prevents the protected application from running in a virtual environment like VMware, VirtualBox, etc.
Memory Protection: Prevents modification of the protected application on disk and in memory.
Strip Debug Information: Removes all debug information from an application and renames all symbols for .NET applications.
What’s New
PE: Improved anti-debug features.
.NET: Improved code mutation.
New Features:
.NET: Added support for self-contained applications.
.NET: Added Stack Trace Decoder.
How to Install?
Download Setup: First, download the setup from the link provided below. Remember, the setup is pre-activated, meaning you won’t need any loader or crack file.
Install the Setup: Install the downloaded setup file. During the installation, you will be asked to enter a password. Use the following password: 78090d9e96e1671a9c7f024a3b99e33bec6cc3a0.
Run the Application: Once installed, you can simply run the application from the desktop shortcut.
Load Your Target: After running the application, load your target and start using it.
mIRC is a software that allows you to communicate, share, play or work on IRC networks.across the world, whether in multi-user group conferencesor private one-on-one discussions.Communications are instantly transferred using windows.It is possible to define a chat group and send messages to multiple peoplesimultaneously.This software provides users with a file transfer protocol.It tracks exchanges to ensure that data is transmitted to its recipient.It is also able to send encrypted files to keep them secure.
mIRC allows the creation of scripts to accomplish certain tasks.For example, it can automatically launch applications that send pre-set messages.It can also launch functions using commands entered on a dedicated console.
(Note: For best image quality, it is best to view this tutorial using Google Chrome.)In this odyssey we will try to uncover the
secret of the Keygens . Watch out!
Olly is getting closer to the galaxy…
“OPERATION mIRC”
LIMITATIONS• 30 days trial•
Bad Nags
THE TOOLS• PROTECtiON iD v.6.6.7 (http://pid.gamecopyworld.com)
•
OllyDbg version 1.0.10.0 – select Odbg110.zip (http://www.ollydbg.de/)
• Visual Studio Professional 2013 with Update 4 (www.microsoft.com/visualstudio/eng/download)
(About Visual Studio: Take a good look at the
cOsMoS .)Before we begin, let’s not forget to work on a copy of the mIRC executable
, a copy that we will name
mirc_CrAcK .
At the same time, let’s create a shortcut of
mirc_CrAcK , which we will place on the desktop.
PROGRAM ANALYSISLet’s open
PROTECTiON iD , making sure that everything circled in red is enabled or checked.
Next, let’s
drag and drop the executable to
PROTECTiON iD .
Following this procedure, we see that the executable is not encrypted or compressed.
PROGRAM ANALYSIS UNDER OLLYDBG 1.0.10.0To see what
mIRC has in store for us, let’s run it under
Olly .
Olly stops at address
00F8 4F6C .(A clarification all the same: each time Olly is restarted
, the first 4 signs of the addresses change,so it is normal that you do not have exactly the same address.By the way, I would apply a different grease to the last 4 signs – those remain the same – like this,you will distinguish them more easily.)
From here, let’s execute a
[F9] .And there you have it! The
mIRC interface is displayed. Let’s click on the
[Continue] button .
Hey! Here’s a
nasty Nag :
mIRC reminds us that this version is
limited to 30 days !”If you have your registration…”. No! but let’s activate the link ”
here ” anyway.
And hop! another
nasty Nag !
ANALYSIS OF THE UGLY NAGIn fact, to use
mIRC in its commercial version and more precisely in its unlimited version,This asks us to enter our
first name ,
last name and the registration
code received by email.Obviously, since we did not purchase the license right, we do not own the Registration
Code .That’s not nice!
Fortunately, there is a way for us to recover this Registration
Code .Let’s assume that it is an algorithm that generates the
Code by retrieving the input from the ”
Full Name ” field .The difficulty lies in situating this algorithm in the program.It’s not simple, but there is a solution: the solution is called an
API (Application Programming Interface).
SendDlgItemMessage : This function is to send a message to a specified control in a dialog box.(Regarding
mIRC , after the
Code is generated by the algorithm and checked, it would send us amessage like:
Code is good or
Code is bad.)
Let’s start by entering the ” Full Name ” and ”
Registration Code ” fields .
Let’s not click the [OK] button just yet .
To retrieve this
API , let’s go back to the main
Olly window .Next, let’s press
[Ctrl+N] ; now we are in the
imports window ; let’s sort them by
type .
Let’s go find
SendDlgItemMessage . Hop! there it is. Let’s put a
BP on each of them marking theirpresence in the program:we select it
> Right click in the window > Set breakpoint on every reference .(There are 426 of them! Shown in the lower left corner of
Olly .)
Let’s go back to the main
Olly window with
[Alt+C] ; let’s activate
mIRC by clicking on the
[OK] button .
Olly ‘s first stop on a
BP of the
SendDlgItemMessageW API . There is nothing that could interest us there.Let’s delete this BP with the [F2] key .
Let’s continue with
[F9] and, once again, activate the
mIRC window by clicking on
[OK] .Second stop of
Olly on a
BP of the
API SendDlgItemMessageW . Here, nothing interesting.Let’s delete this
BP with the
[F2] key .
Let’s continue with
[F9] …, and hop!
Olly stops a third time on a
BP of the
SendDlgItemMessageW API withoutthat we need to intervene in the
mIRC window . And here, friends, it starts to get very interesting.Before going further, let’s delete all the
BPs placed on our
API :
[Ctrl+N] > we are back in the windowimports;
SendDlgItemMessageW API must be selected
> Right-click > Remove all breakpoint .And there you have it. Next, let’s activate an
[Alt+C] to return to the main
Olly window .Now let’s step through the routine by activating
31 x F8 and carefully observing what
Olly displays in the
main window ,
registers and
stack , up to
the CALL whose address on my PC is
00EB C9C7 .By the way, let’s immediately place a
BP on this
CALL with
[F2] (we will keep this
BP throughout our analysis,because it will be our reference point, so
don’t delete it ).We will enter this
CALL with
[F7] , because the previous 2 command lines contain our entries, and Ithinks that these will probably be used downstream of this subroutine.
How are we going to localize this algorithm?In order to generate the famous
Code , the program retrieves each character of our
name and processes it via the algorithm.To carry out this process, the program uses a system of loops; it is thanks to these loops that we will be able tospot this algorithm. Since
Olly displays this system, let’s start looking for these loops.We are at the beginning of this subroutine. Let’s activate
36 x F8 in order to arrive at the
CALL at address
00EB AD33 .As before, the
registers and
stack show some very interesting values.Let’s enter this new
CALL with
[F7] .
We are now on the first command line of this subroutine.
From this command line, let’s press
56 x F8 to go to address
00EB AB60 .This address is truly the starting point of our analysis, because the elements that we have been looking for from the beginningare located from this address. In order to follow my comments, I advise you to trace this subroutine atusing the
[F8] key , and this, up to the address
00EB ABB4 . There, we place a
BP with
[F2] .In this part, to understand the flow of the program, it is important to observe, line by line, the
registers , the
stack and the ”
info ” area of
Olly .
00EB ABB4 is the address that will allow us to discover the start of the algorithm and calculate its length.Let’s start by discovering the beginning by
right-clicking on the address displayed in the ”
info ” area of
Olly .Next, select ”
Follow address in Dump “. (Reminder: on your PC, the addresses are different.)
The first hexadecimal value in the algorithm starts with
0B . (Be careful!
0B is not an address, but avalue; so on your PC it should also be
0B .)
Next, to know the length of the algorithm, we will have to do a little calculation.At address
00EB ABB4 , the reasoning is as follows:the segment address
SS:[003F 81C8 ] represents the start of the algorithm; its content
SS:[ESP+ECX*4+14]tells us its length.Let’s calculate
ESP+ECX*4+14 :• Let’s open the Windows Calculator;• Let’s select “Hex” (yes! we are in hexadecimal);• In the registers,
ESP is equal to
003F 81B4 (on my PC);•
ECX will have the value
26 (yes, because – note that we are in a loop – at the address
00EB ABBC the line ofcommand displays
CMP ECX,26 . If
ECX is arithmetically greater than
26 , the
JLE on the next line does notdoes not jump and goes through the
XOR ECX, ECX returning
0 to
ECX .In this loop, the command lines clearly show that
ECX will never be larger than
26 .So here is the operation to be carried out:
003F 81B4 + 26 x 4 + 14 = 003F 8260. Let’s remember this address.
Let’s go back to the
Dump . The address
003F 8260 represents the last hexadecimal value of the algorithm.
003F 8258 =
0A
003F 8259 = 00
003F 825A = 00
003F 825B = 00
003F 825C =
04
003F 825D = 00
003F 825E = 00
003F 825F = 00
003F 8260 =
10
The values forming the algorithm are these: (obviously, the
0B 09 0C 0B 0A 08 0A 0A 10 08 04 06 0A 0C 10 08 0A 04 10We have localized the algorithm, but to realize a
KeYgEn , this is not enough.
CODE FORMFinding the form of the
Code is quite simple, because we have clues: our
name is processed twice.The first time, the program retrieves our
name in this first loop.
Then it processes our
name in the first loop linked to the algorithm.
The second time, the program retrieves our
name in this second loop.
And finally, it processes our name again in the second loop, also linked to the algorithm.
Other clues:
2D in ASCII character is equal to the dash ”
– “.”
%ld-%ld ” in Visual C++: we are in the presence of two variables of type long, separated by a hyphen.Combined with printf, the output might look like this:
12345-67890 .There is no doubt, thanks to all these clues, we can remember that the form of the
Code is two numbersseparated by a dash.
Now, let’s note the instruction lines (in yellow), they will be used to program our
KeYgEn .First loop.
Second loop.
Before closing
Olly , if necessary, let’s delete all
BP ,
except one (as I said before),the
BP at address
00EB C9C7 . Let’s close
Olly with
[Alt+X] .
THE BIG MOMENT HAS ARRIVED TO MAKE OUR KEYGEN. LET’S LAUNCH VISUAL STUDIO!On the start page, click on
New Project… .
Next, in the “
New Project ” window , select
Windows .
To create our
KeYgEn , let’s select
.NET Framework 2.0 and Windows Forms Application… Visual Basic .
Let’s fill in the fields by naming our folder and listing its location.
Let’s close the ” New Project ” window by clicking on
[OK] .At this point we discover the graphical interface, it is in some way a work plan which will allow usto carry out our project.To the left of this space is
the toolbox containing objects called
controls , they will be used to create
TexBox ,
Labels ,
Buttons , etc. In the center, this form, called ”
sheet ” (Form1), will represent the interface ofour
KeYgEn .Above, in the toolbar, the
[Start] button will allow us to generate the code or events enteredpreviously and to appreciate or not the result. (It also allows you to save the project.)
To the right of this space is the
properties window .It will allow us to configure the objects that we have placed in the form (Form1);we will be able
to choose a color, enter text, specify a position , etc.The icons in the red box are important because they will allow us to displaydifferent
property options .
Let’s select the first icon representing the
list by category ,
and the third representing the
properties .
The main areas of work having been presented, we can begin the creation of our
KeYgEn .Let’s go back to this ”
sheet ” (Form1). The graphics on this one are really very basic.Let’s give him a real visual of
KeYgEn .
Normally this shape is selected by default. If it is not, let’s select it.By the way, from now on we will no longer call it form, but
KeYgEn .Let’s change its name:
Properties > Design > (Name) => Enter Keygen
After entering, to generate the values,
click on the main window of
Visual Studio “Form1”.
(Get into this habit when you want to generate property values . There are other ways to generate values,we will see this during this adventure.)Let’s change its dimensions:
Properties > Layout > Size => Let’s enter 285; 255 (Let’s generate the entered values.)
Let’s remove the Windows graphics:
Properties > Appearance > FormBorderStyle > [Click on the small arrow] => Select None
(Let’s generate the selected value.)
Let’s color the background of our
KeYgEn in black:
Properties > Appearance > BackColor => Let’s enter 2; 2; 2 (Let’s generate the entered values.)
Position of our
KeYgEn on the screen:
Properties > Layout > StartPosition > [Click on the small arrow] => Select CenterScreen
(Let’s generate the selected value.)
TopMost position on screen:
Properties > Window Style > TopMost > [Click on the small arrow] => Select “True”
(Let’s generate the selected value.)
When we display our
KeYgEn on the screen, it would be nice to be able to move it using our mouse cursor.To get this, we’re going to enter a bit of code.I’m not going to embark on a programming course, because that’s not the goal of this adventure,and it would be much too long; nevertheless, I will bring some information, in particular, when we convertthe algorithm structures and the two loops in
Visual Basic .
Let’s start by activating the ” Events ” icon (circled in red).
Properties > Mouse > MouseDown => Let’s type Keygen_MouseDown (Let’s generate the entry.)
By generating the input, we arrive in the Visual Studio programming space .
In the
Public Class part , we will declare an
Instance and
variables .When you want to add a space to the left of the lines of code, use the
[Tab] key on the keyboard.To perform a line return, press the
[Enter] key on the keyboard.
When we have finished entering the lines of code, let’s return to the space of our
KeYgEnby
clicking on the Form1.vb [Creation]* tab .
So far, nothing too complicated. Now, let’s do the same with
MouseMove .
Properties > Mouse > MouseMove => Let’s type Keygen_MouseMove (Let’s generate the entry.)
Once again, by generating the input, we return to the
Visual Studio programming space .Let’s write these few instructions inside a
conditional structure .
Then, as before, let’s return to the space of our
KeYgEn .After all this achievement, it is time to appreciate the result: let’s click on the
[Start] button .
Our
KeYgEn begins to take shape; it appears in the middle of our screen;we move it with our mouse cursor.To stop debugging and return to the space of our
KeYgEn , let’s click on the
[Stop] button ,as shown in the image below.
Now, we are going to associate a music with our
KeYgEn . Well yes!, it’s still better!To begin with, we need to prepare a music file whose format is
.wav . Then we need to loadthis file in
resources .In the menu bar
PROJECT > [last line of the context menu]
Properties… > [on the left, in the list]
Resources > Add a resource [activate the small arrow] > Add an existing file…
Windows Explorer opens, allowing us to select the
.wav file that we have previously prepared.Remember to select
All Files (*.*) or Audio (*.wav)Then, let’s click on
[open] … and there you have it!
Let’s go back to the GUI – where our
KeYgEn is – by clicking on the
Form1.vb [Creation] tab .Then…,
Properties > Behavior > Load => Enter Keygen_Load
Next, let’s go to the programming space by clicking on the
blue Load rectangle ,because we have some codes to write.
Here we are. Let’s write these 2 lines of code:
Tip: When our input cursor arrives on
SoundPlayer(My.Resources.Visual Studio IDE automatically displays the name of our wav
file (blue rectangle: My_Music ),then you just have to press the
[Tab] key on your keyboard so that it appears after
My.Resources.(Remember to enter a closing parenthesis after
My_Music , see previous image.)
The 2 lines of code having been written, let’s return to the graphical interface by clicking on the
Form1.vb [Creation]* tab .Now we’re going to add an image to our
KeYgEn . Head over to the
toolbox , and in there,Let’s select
PictureBox .
Next, let’s hover our mouse cursor over our
KeYgEn . At that point, the cursor will take the form of
the PictureBox icon with a small cross-shaped mark.Let’s place this icon in the corner of our
KeYgEn as shown in the image below:
Then, to form the image block, let’s drag and drop a little further down to the right:
Let’s adjust the image block to our
KeYgEn .
Don’t forget to select the Properties icon .
Properties > Layout > Location => X enter 0 ; Y enter 0Regarding the entry of positions , validate this by clicking once on the blue rectangle of
X , then
Y.
Let’s size the image block to 285 x 146 pixels.
Properties > Layout > Size => Width enter 285; Height enter 146 (Validate.)
Before loading an image into the
resources , we need to prepare it:choose a theme, colors, create a shape, etc., it’s up to you.A word of advice: to avoid deformation of the latter, it is preferable that its dimensions are identical to the blockimage we created in our
Keygen (285 x 146 pixels).Regarding the choice of the format of your file, it differs depending on the type of image and the desired effect:gif or animated gif; jpg; png (if your image contains transparencies).When this image is created, we return to
Visual Studio , we select the image block that we hadpreviously made, then
right click in this block > Choose an image…
In the… window, select
=> Project resource file: > Import…Windows Explorer opens, select the
file format , then our
image file , then
Open > [OK] .
Here we are with a beautiful
KeYgEn !If you want to launch your
KeYgEn using the Visual Studio [Start] button , you
will notice that by placing theyour mouse cursor over the image you just created, you cannot move it within your screen space.This is normal…, as we did with the background of our
KeYgEn , we must code the object or controlcorresponding to the image block.This must be applied to every object created. (We’ll see this a bit later.)Now, to correlate with the
nasty Nag of
mIRC Registration , we need to create the
input fields ,buttons
, etc.You have learned how to create an image block, now we will use an object (
Label ), it is exactly the sameprocedure, it is only the tool that changes.To begin with, using this object, we will create a sort of “text block” in which we will enter ”
Full Name “.Let’s head over to the
Toolbox and select
Label .
Then, using our mouse cursor, let’s drag and drop it just below the image block created previously.Have you noticed ?When we create an object or a block – during drag and drop – information about the dimensions ofthe object is displayed in the lower right corner of our screen. This is useful because it allows us to get as close as possiblethe intended dimensions. Then, to refine the dimensions, just go to the
properties , as we havepreviously done for the image block.
Before entering the text, let’s choose its color. Let’s check that the
Label1 object is selected.Afterwards…,
Properties > Appearance > ForeColor > [Click on the small arrow] System => select “GrayText” .
Regarding the background color, there is no need to intervene, because when we created the background color of our
KeYgEn (2; 2; 2), this remains the default background color.Moreover, we only need to pay attention to the
BackColor role (image above), to see that the coloris a black referenced 2; 2; 2.That’s it for the color. Now let’s enter the text:
Properties > Appearance > Text => Let’s enter Full Name (Validate.)
This being accomplished, let’s position our object in the space of our
KeYgEn :
Properties > Layout > Location => X enter 8; Y enter 146 (Validate.)Regarding its dimensions, there is no need to be interested in it, because the
AutoSize role sets ”
True ” by default, therefore,The dimensions apply depending on the text (number of typographic characters; font; weight; body).
Now we’re going to create a
control that allows us to enter our name.To do this, let’s head over to the
Toolbox and select
TextBox .
As before, let’s drag and drop just below ”
Full Name “.
When creating this
control , I notice that the
BackColor role no longer displays 2; 2; 2 by default.It’s touchy computing! So let’s always be vigilant and apply our background color:
Next, let’s change the appearance defining the edge of the frame:
Properties > Appearance > BorderStyle > [Click on the little arrow] => Select “FixedSingle” .
As I told you before, this control is reserved for the text that we will enter,we will therefore adapt the appearance of this text to the visual of
KeYgEn .Let’s apply some grease:
Properties > Appearance > Font > Bold > [Click on the little arrow] => Select “True” .
Let’s apply a color:
Properties > Appearance > ForeColor => Let’s enter 184; 1; 15 (Let’s validate.)Let’s apply a position (the entered characters will be displayed centered):
Properties > Appearance > TextAlign > [Click on the little arrow] => Select “Center” .
Now let’s place our
control – precisely – in the space reserved for it:the position :
Properties > Layout > Location => X enter 12; Y enter 161 (Validate.)the dimensions :
Properties > Layout > Size => Width enter 150; Height enter 20 (Validate.)
Come on! For the ”
fun ” part, let’s click on the
[Start] button of
Visual Studio , turn up the volume of our speakers and enjoy!
Let’s close by clicking on the
[Stop] button . Friends!, this is just the beginning, the best is yet to come!Let’s continue by creating a second
Label which we will call ”
Registration Code “.Let’s head over to the
Toolbox and select
Label .
As before, using our mouse cursor, let’s drag and drop this objectjust below the
control (
TextBox1 ) that we just made.The first
Label we created is called ”
Label1 “, this one is called ”
Label2 “.Let’s check that the ”
Label2 ” object is selected.Before entering the text, let’s choose its color (the same as ”
Label1 “):
Properties > Appearance > ForeColor > [Click on the small arrow] System => select “GrayText” .
By the way, we notice that the
BackColor role correctly displays the background color 2; 2; 2.Let’s enter the text:
Properties > Appearance > Text => Let’s enter Registration Code (Validate.)
Let’s position our object precisely:
Properties > Layout > Location => X enter 8; Y enter 185 (Validate.)
Now we will create a second
control , it will have the function of displaying the
Code generated by the algorithm.The first
control is named ”
TextBox1 “, this one is named ”
TextBox2 “.To do this, let’s head over to the
Toolbox and select
TextBox .
As before, let’s drag and drop just below ”
Registration Code “.
Let’s not forget to select our
control (
TextBox2 ), then apply our usual background color:
&H4, &H6, &HA, &HC, &H10, &H8, &HA, &H4, &H10}Now let’s enter this algorithm into the programming part of
Visual Studio .
Let’s double-click on the black background of our
KeYgEn , in order to access this space.
If necessary, let’s go back up to the top, in the
Public Class Keygen section .First, let’s declare the
data variable :
Dim data() As Integer(
Dim = statement [declares and allocates];
data = variable name;
As = as;
Integer = Type).I advise you to take the time to enter these lines of code (read yourself), because programming does not allowno errors, no failures.
Once this is done, let’s click on the [Start] button , in order to generate these lines of code…
…then, on the
[Stop] button …
…and finally, let’s click on the Form1.vb [Creation] tab , in order to return to our
KeYgEn .
That’s it! For now, let’s close
Visual Studio ; we’ll come back to that later.Now we need to analyze and convert into
VB the two loops discovered under
Olly .Let’s start with the first loop.
MOV EDX,3 => With this instruction, the program initializes
RoL l IaPrO from the fourth character, i.e. (
l ).This requires us to enter (in the ”
Full name ” field) at least 4 characters, so as not to generate the Code
0-0 .
We will create a procedure [the
Function statement ] that returns a value (this value will be the first partof
the Code ):
Function hash1(ByVal name As String) As UIntegerInside this structure, let’s declare our
variables :
Dim i As UInteger, hash As UInteger, p As UIntegerThe
variable p represents the string of values of the algorithm. By giving it the value
0 , we associate it with the firstelement of the algorithm (
&H B ):
p = 0Next, let’s create a
repeating structure (loop) with
For…Next statements .The command line below represents the loop counter:the
variable i = its starting value (
3 ) to its ending value (length of the name
RoL lIaPrO ), decremented by
1 each timeiteration:
For i = 3 To name.Length -1Correspond to :
MOVZX EDI,WORD PTR DS:[ESI+EDX*2]
INC EDX
CMP EDX,EAXThe command line below represents – at the first iteration – the multiplication between the fourth character of
RoL l IaPrO [ Asc(name.Chars(i)) ] and the first value of algorithm
B [ data(p) ] . The hash
variable is the equivalentof
EBP , it retrieves the sum of the operation and keeps it in memory. Therefore, at the second iteration, the newamount will be added to the one kept in memory, etc.
hash += Asc(name.Chars(i)) * data(p)Correspond to :
IMUL EDI,DWORD PTR SS:[ESP+ECX*4*14]
ADD EBP,EDIThe
variable p is incremented by
1 step at each iteration. Therefore, at each return, the calculation will be based on the valuenext step of the algorithm.
p = p + 1Correspond to :
INC ECXInside the
Function hash1 structure , let’s insert another structure called a
conditional loop .The command line below means: if the
variable p is greater than
26 (hexadecimal),then, the
variable p will recover
0 .In this case, the
variable p is reset to the first value of the algorithm, i.e.:
&H B
If p > &H26 Then
p = 0
End IfCorrespond to :
CMP ECX,26
XOR ECX,ECXThen, the
Next statement is associated with the
For statement . When the program arrives at this statement, itincrements or decrements by the step specified in the command line
For i = 3 To name.Length -1 .Here, the step is
-1 . So,
Next will decrement by 1 step along the length of the name
RoLlIaPrO each loop cycle.
NextCorrespond to :
INC EDX
And finally, the Return instruction to return the value to the calling code (the sum stored in memory by the hash
variablewill be returned on this same
variable , and at each loop cycle a new sum will be added to it. At the lastloop cycle, this value [
sum ] of the calling code will represent the first part of the
Code [
Registration Code ]).
Return hashEssential instruction at the end of the structure:
End FunctionThe analysis and conversion to
VB of the first loop is complete.Now let’s take care of the second loop, this one is almost identical to the first one.The difference lies in this sense:so that the second part of the
Code is not identical to the first part, some instructions have been added.To better understand, let’s go back to this second loop.
The analysis will focus – mainly – on the differences between the two loops.Let’s start by creating a second procedure [ the Function
statement ] that returns a value(this value will be, this time, the second part of the
Code [
Registration Code ]), we will name it
hash2 :
Function hash2(ByVal name As String) As UIntegerInside this structure, let’s declare our
variables :
Dim i As UInteger, hash As UInteger, p As UIntegerThen, the
variable p having value
0
p = 0To better understand the next part, I advise you to consult the previous image as often as necessary.Let’s create the
repeating structure (loop) with
For…Next statements .Let’s begin…
For i = 3 To name.Length -1Be careful, because the difference is there, inside this structure.Added line of code:
Asc(name.Chars(i – 1))It corresponds to:
MOVZX EDI,WORD PTR DS:[ESI+ECX*2-2]This line of code creates, on the name
RoLlIaPrO , a decrement of
1 typographic character compared to the linecommands
MOVZX EBP,WORD PTR DS:[ESI+ECX*2] .They are identical, it is the
-2 that creates the difference. (One is retrieved by
EDI , the other by
EBP .)Then these two command lines multiply each other.The multiplication between these two command lines occurs under the
IMUL EDI,EBP instructionI hope this doesn’t sound too complicated; I’m trying to be as specific as possible, however,I expect – from some of you – this question:why is
RoLlIaPrO
decremented by
1 character, while the code indicates
-2 ?Isn’t that a good question? Here’s the answer:When we analyze the two loops under
Olly , let’s look towards the
Dump .
The hexadecimal numbers representing the RoLlIaPrO typographic characters are separated by the codehexadecimal
00 of zero value (no character). Therefore, between
2 characters, the decrement value is
-2 .On the other hand,
VB does not use this hexadecimal code
00 between
2 characters, so the decrement value is
-1 .
Well, let’s continue…, and enter this famous instruction:
hash += Asc(name.Chars(i – 1)) * Asc(name.Chars(i)) * data(p)The rest is identical to the first procedure (
Function hash1 ):
p = p + 1
If p > &H26 Then
p = 0
End If
Next
Return hash
End FunctionAnd there you have it! Now it’s time to open
Visual Studio and go back to the space where our
KeYgEn is located .We have just created the program that will generate the
Code in the ”
Registration Code ” field.Let’s enter this program in the space dedicated to it, and to do this,
double-click on the black background ofour
KeYgEn :
If necessary, let’s go back up to the top, in the ”
Public Class Keygen ” section.Let’s place our mouse cursor at the end of the algorithm, just after the closing curly bracket (see the image below)[red circle]), then execute the [Enter] key on our keyboard
twice .This procedure allows us to introduce a new structure taking into account spaces.And here, let’s enter our program (image below).
To generate these lines of code, click on the
[Start] button , then on the
[Stop] button ,and finally, on the
Form1.vb [Creation] tab : we have returned to the space of our
KeYgEn .Our program is ready, but not quite. To generate the
Code (
Registration Code ) by activating the button
[GeNeRaTe – mIRC v7.41] , we need to program it.As shown in the figure below, let’s access its own structure by
double-clicking on this button.
We arrive in this structure named
Button1_Click .
As shown in the image below, let’s enter the two lines of code. Be careful to respectthe spaces between signs and words.
MouseDownBackColor role which, I remind you, specifies the color of theclient area of the button as soon as we produce a mouse “click” within the limits of the
control .
Properties > Appearance > FlatAppearance > MouseDownBackColor => Let’s enter 184; 1; 15 (Let’s validate.)For this to work, the
FlatStyle role must rely on ”
Flat “.
Properties > Appearance > FlatAppearance > FlatStyle > [Click on the little arrow] => Select “Flat” .
Before entering the text, let’s select its color:
Properties > Appearance > ForeColor > [Click on the small arrow] System => select “GrayText” .
Now let’s enter the text:
Properties > Appearance > Text => Let’s enter cOpY (Validate.)
Let’s arrange our
control precisely:the position :
Properties > Layout > Location => X enter 228; Y enter 200 (Validate.)the dimensions :
Properties > Layout > Size => Width enter 57; Height enter 20 (Validate.)
And there you have it! The graphic design of the button allowing us to save the
Code in the “Clipboard” is finished.Now, in order for this button to generate the desired event when activated,we need to associate a line of code with it.By
double-clicking on this button, we access the space that will allow us to enter this line of code.
We are in the structure of the button
[cOpY] named
Button2_Click .
Next, let’s enter the line of codes as shown in the image below:
When we are done, let’s go back to our
KeYgEn space by clicking on the
Form1.vb [Creation]* tab .
Then, as before, let’s click on
[Start] to generate our program.
For the last time, let’s close our
KeYgEn using the
[Stop] button in
Visual Studio .Now we will create the
[cLoSe] button .Let’s head over to the
Toolbox and select the Button
control .
Let’s drag and drop it next to the
[GeNeRaTe – mIRC v7.41] button .
Before we go to the
properties , let’s not forget to select this
control named ”
Button3 “.Verification: In the
properties , the
BackColor role of this object must be 2; 2; 2.(This color reference must be displayed by default, otherwise, enter manually.)As before, regarding the
Cursor role, let’s choose the ”
Hand ” parameter :
Properties > Appearance > Cursor > [Click on the little arrow] => Select “Hand” .
Next, let’s remove that ugly border around the button:
Properties > Appearance > FlatAppearance > FlatStyle > [Click on the little arrow] => Select “Flat” .
Let’s select the text color:
Properties > Appearance > ForeColor > [Click on the small arrow] System => select “GrayText” .
Let’s enter the text:
Properties > Appearance > Text => Let’s enter cLoSe (Validate.)
Let’s arrange our
control precisely:the position :
Properties > Layout > Location => X enter 228; Y enter 228 (Validate.)the dimensions :
Properties > Layout > Size => Width enter 57; Height enter 20 (Validate.)
The graphic design of the button allowing us to close our
KeYgEn is complete.
Now, like the [cOpY] button , so that this button generates the desired event when activated,we need to associate a line of code with it.By
double-clicking on this button, we access the space that will allow us to enter this line of code.
We are in the structure of the button
[cLoSe] named
Button3_Click .
Next, let’s enter the line of codes as shown in the image below:
When we are done, let’s go back to our
KeYgEn space by clicking on the
Form1.vb [Creation]* tab .
Then, as before, let’s click on
[Start] to generate our program.
Now we can close our
KeYgEn using the
[cLoSe] button .
Our
KeYgEn is almost finished!Remember, when we integrated the image into the space of our
KeYgEn , we noticedthat
by placing our mouse cursor – inside this image block – we could not move itin the
screen surface.To remedy this, we need to associate the name of the objects that are relevant to this incidenceto the structure of
” MouseDown ” and that of ” MouseMove “.These objects are:The object containing the image with the
property name ”
PictureBox1 “.The object representing the label ”
Full Name ” with the
property name ”
Label1 “.The object representing the label ”
Registration Code ” with the
property name ”
Label2 “.To apply this,
let’s double-click on the background of our
KeYgEn :
We’ve returned to the Visual Studio programming space .Each object name must be followed by a comma, so remember to enter a comma after
MouseDown(see red circle).Reminder: to make your entry easier: use the ”
listbox “, this is automatically displayed when the cursorof your mouse arrives at the appropriate place.You have two solutions for use: when you have selected the name, you
double-click on it
or you press the [Tab] key .
After entering, here is the result:
This being done, let’s return to the space of our
KeYgEn by clicking on the
Form1.vb[Creation]* tab :
Then, as we usually do, let’s generate these lines of code by clicking on
[Start] .Now we can move our
KeYgEn by placing our mouse cursor on all of its surfaces, except, of courseheard, on buttons and input fields. Let’s close our
KeYgEn and
Visual Studio .However, we still have one small detail: to launch our
KeYgEn , we need to activate an executable.Under
Visual Studio the executable icon is not customized, it is a default visual,so we’re going to change that.
To begin with, we need to prepare an .ico file . We can grab a pre-made graphic from the Internet,but, if you have imagination, I strongly advise you to create a graphic in Illustrator or Photoshop.In Photoshop, save your file in
PNG-24 , this allows you to preserve the transparencies of your creation.Next, download
IconWorkshop (publisher:
axialis.com ), in order to convert your
PNG file to
.ico .When our ”
.ico ” file is ready, let’s open
Visual Studio and then access the general properties of our
KeYgEnby clicking on
Project > Properties…
After this action, we access a window, then we select the
Application tab .
Then, let’s select
<Browse…> , in order to reach our ”
.ico ” file.
We select it…,
Open …, and there you have it!
Let’s save this procedure by clicking on the
[Start] button , then, following this last generation,Let’s close our
KeYgEn by clicking on the
[cLoSe] button . Now we can close
Visual Studio .Where is the executable?Remember, when we opened
Visual Studio to create our
KeYgEn , we named a folder enlisting its location.It is from this folder that we will retrieve the executable of our
KeYgEn , the directory of which is as follows:
name of our folder\bin\Debug\
Obviously, you can copy, move or upload this executable.To continue working on
mIRC , I advise you to create a copy of this executable on your desktop.Good! Now it would be time to test the
Code that we obtained thanks to our
KeYgEn .This time, let’s launch our
KeYgEn via the executable; enter our name in the ”
Full Name ” field; click on the
[GeNeRaTe – mIRC v7.41] button , in order to generate the
Code , and finally, click on the
[cOpY] button , to copy it into the”Clipboard”.Let’s launch
mIRC via its shortcut on the desktop.
In the ” About mIRC ” window ,
mIRC gives us an indication:”If you have your registration, please enter it here”. Yes, of course, we have it! So, let’s click on ”
here “.
Let’s enter our name in the ”
Full Name ” field. Then, let’s activate the
[Ctrl+V] keys , in order to paste our
Codein the ”
Registration Code ” field, then start the entries by clicking on the
[OK] button .
It does not work ? !
Our
Code is good, yet… it doesn’t work.In your opinion, do you know why? I imagine that some of you have the answer.Here is the answer :The
Code is not enough to unlock the program, there is a second protection.The answer is in the window title: ”
mIRC Registration “.Yes! We have to register our
Code via the Internet. Are we blocked?No! Don’t worry, we will fix that.Let’s think for two seconds…: in a
nasty Nag , there is a
[Register] button ,This means that there is a registration address somewhere in the program.Let’s close
mIRC and open it under
Olly . Then,
[F9] .
mIRC displays the ”
About mIRC ” window, click on ”
here “:
The ” mIRC Registration ” window opens. As before, let’s fill in the fields and then click the
[OK] button .
Olly stops at the
BP we had left in place.It is thanks to this
CALL that we discovered the two loops and the algorithm.
Let’s advance through the routine by pressing
7 x [F8] , so that we are at address
011B C9E6 .By executing the
CALL located at address
011B C9E1 , we discover that it creates an alphanumeric string.This string is actually generated by an algorithm from our
Code .So your channel will be different from mine.This has a very important role since it will establish the link with the
mIRC server , in order to identify our
Codeand thus, validate it by a response to our computer.(By the way, there is software that can intercept server responses.)
Our goal is to bypass the action of this link.Noticed :when you execute the
CALL located at address
011B CA41 , you will see, by projecting yourself towards the
stack ,that it will generate the Internet address allowing us to register our
Code .See (below) the contents of the
stack at the time of execution of this
CALL :
For now, we are still at address
011B C9E6 .Let’s go on…
26 x [F8] , and we are at address
011B CA4B .There, the
JNZ must imperatively jump to address
011B CAE4 , in order to avoid the
JMP located at address
011B CADF .Let’s replace the
JNZ with a
JE : the command line being selected;
double-click on it;
The ” Assemble at 011B CA4B ” window opens; type
JE 011BCAE4 > Assemble > Cancel .
011BCA4B | CrAcK | I mirc_CrA.011BCAE4(Be careful, as I told you at the beginning, your PC displays different addresses.)
Let’s go on…
25 x [F8] , and we are at address
011B CB3E .At this address, the
I jumps. It must not jump, because the
CALL which is responsible for validating our
Code ,without going through the Internet, is located at the address
011B CB5F .Let’s replace this
JE with a
JNZ : the command line being selected;
double-click on it;
The ” Assemble at 011B CB3E ” window opens; type
JNZ SHORT 011BCB6E > Assemble > Cancel .
011BCB3E | CrAcK | JNZ SHORT mirc_CrA.011BCB6E
Then
[F9] …
Yes ! This time, everything is
perfect !Let’s not activate the
[OK] button in the ”
mIRC Registration ” window , because, first,we need to save the changes made in
Olly .
Let’s go back to
Olly by clicking on its icon (in the taskbar), then
right-clicking in its main window;select =>
Copy to executable > All modifications :
Then, in the ”
Copy selection to executable file ” window, select =>
Copy all :
Olly ‘s D window opens; right-click in this window, select => Save file :
Windows Explorer opens displaying the
mIRC directory => click on the
[Save] button ;
the ” File exists” window opens > click on the
[Yes] button :
Now we can close
Olly by pressing the keyboard keys
[Alt+X] .By this procedure,
mIRC and
Olly were closed.It’s time to test
mIRC .Let’s go to the desktop and
double-click on the
mIRC_CrAcK.exe shortcut :
alas! there is still a problem…,
mIRC does not open!
mIRC most likely has a third protection. What is this protection? Do you have any idea?
Checksum !, does that ring a bell? The
checksum is a more or less complex calculation system,allowing to compare the fingerprint or the sum of two strings.For us, it checks whether the sum of the hexadecimal values of the instructions is the same as the original.Once done, it returns a value.If this does not match the value initialized by the original, well… I would say that taking into accountchanges we made to the program…, we know the end of the story.Definitely,
mIRC is not an easy opponent, but once again, thanks to
Olly ‘s unstoppable attack ,we will fix that.Let’s open
mIRC under
Olly , then launch it with a
[F9] . Result…
mIRC ”
sends us to hell ” [
sic Junlajubalam ].
Let’s use Olly ‘s unstoppable weapon by clicking the
[K] button, in order to find out what the last
CALL executed was. by the program before going to ”
hell “.
With this action, the K window opens and shows us the path to follow:the line located at address
0028 F788 is probably the right track.
Double-click on this line, in the ”
Called from ” column:
This operation takes us to the instruction line located at address
010B 4F0A . Let’s place a
BP on this
CALL :
Once this is done, let’s relaunch the program with a
[Ctrl+F2] , then…
[F9] .
Olly stops at our
BP at
0046 4F0A .Since the
checksum is upstream of this address, we are in a good position to recover a clueor an interesting reference. (We can delete this
BP .)In this window,
right-click , select =>
Search for > All referenced text strings :
In this
R window , let’s use the scroll bar located on the right of our screen, in order to go up,to the first line;
select it ;
right-click and choose =>
Search for text :
What reference will we look for to neutralize the return value of the
checksum ?Let’s think for a moment…First, we need to find out where in the program it generates this value.We know that the
checksum analyzes the executable in its entirety, it would be relevant to apply a searchon the
name of our executable, that is: mirc_CrAcK.exe .Let’s type
mirc_CrAcK.exe and then click
[OK] .
Next, press
the [L] key 5 times while holding the [Ctrl] key .This operation takes us to address
0030 B6F0 .This line is interesting because it is preceded by an
alphanumeric string .This is not there by chance, it is probably recovered by the
checksum .With this line selected, let’s press the
[Enter] key on our keyboard,in order to project ourselves into the main
Olly window .
Here we are.The
alphanumeric string is just before our line, that’s a good omen.Let’s put a
BP on this line located at address
0030 B6F0 :
Then let’s relaunch the program with
[Ctrl+F2] > Yes > [F9] , and here we are again.(A little reminder: when we relaunch the program, the address is not necessarily the same,only the last four signs do not change.)
So we’re back to the same address, but this time the program is running.From this address, we will not follow the routine with
[F8] , because it risks being much too long,let’s use
our mouse wheel: go down… , go down… , and stop when we discover
a set of loops, because that’s where the checksum operates.The figure below shows a real textbook case, because this set of loops is quite complex.As far as we are concerned, it is not really its content that interests us, but its outcome.After a multitude of rounds, the routine comes out of this set, but to go where?The best way to get an answer to this question is to considerall conditional jumps generating their landing point outside this loop assembly.(Be careful though, because when CALLS
are within a combination of loops,it sometimes happens [rare] that the routine disappears into the depths of one of these, so be careful!)Here, two outputs are possible: one at address
000E B883 , and the other at address
000E B8A7 .To find out which of these two addresses will retrieve the routine, simply place a
BP on each of them,then execute a
[F9] (don’t execute this [F9]
right away ) .I have intentionally indicated the conditional jump located at address
000E B7CF , it is not inside this set ofloops, but its position and drop point are important clues, because if
EAX is equal to
-1 , the
JE avoids allthese loops, and therefore, the
checksum .In fact, when the program has not undergone any modification, the routine goes through the address
000E B883 .Moreover, this conditional jump to address
000E B7CF is quite surprising , this would suppose that a first check would havewas applied by retrieving the alphanumeric string ”
99d91de80314978804605952 ” located a little further upstream.
Now… let’s run this
[F9] ; the routine stops running at address
000E B8A7 .
Next, let’s execute
19 x [F8] .It is really very interesting to follow the progress of the program, because at the address
000E B8DA ,this one goes through a
JMP which sends it back on the path taken by the routine when it does notnot subject to any modification.Now we are able to ask ourselves this question: what are the differences between these two routines?In the figure below I indicate these differences:at address
000E B8DA , the
JMP returns an
EAX =
00000002 , while the correct routine – the one that opensthe program – encapsulates the XOR instruction
EAX,EAX (address
000E B88C ), i.e.
EAX =
00000000 .
Now that we understand how the program works, and in order for it to work properly,we will make
EAX equal to
00000000 .Let’s modify the
JMP so that it points the program towards the
XOR EAX,EAX instruction :
double-click on the selected line, enter =>
JMP SHORT 000EB88C(as usual, on your PC the address is different), then
Assemble > Cancel .
000EB8DA | CrAcK | JMP SHORT mirc_CrA.000EB88C
As before, let’s save this modification:
right click in
Olly main window
> Copy to executable > All modifications > Copy All > right click
in window D > Save file > Save > Yes.Now let’s go back to the main
Olly window with
[Alt+C] , then execute a
[F9] ;
The ” mIRC Registration ” window opens; click on the
[OK] button .
Now the program has become nice to us
, it opens normally. Let’s click on the
[OK] button :
The ” About mIRC ” window opens:
Now we can use the program,
mIRC has become really nice to us.
Let’s go back to
Olly and exit with
[Alt+X] .Let’s not forget to delete the original executable and rename (same name as original)the copy of the executable ”
mirc_CrAcK.exe ” on which we operated.And there you have it… our mission is complete.